Centering Artistic Choice Making

Examples, tips and tools to support children in developing their choicemaking skills across expressive media.
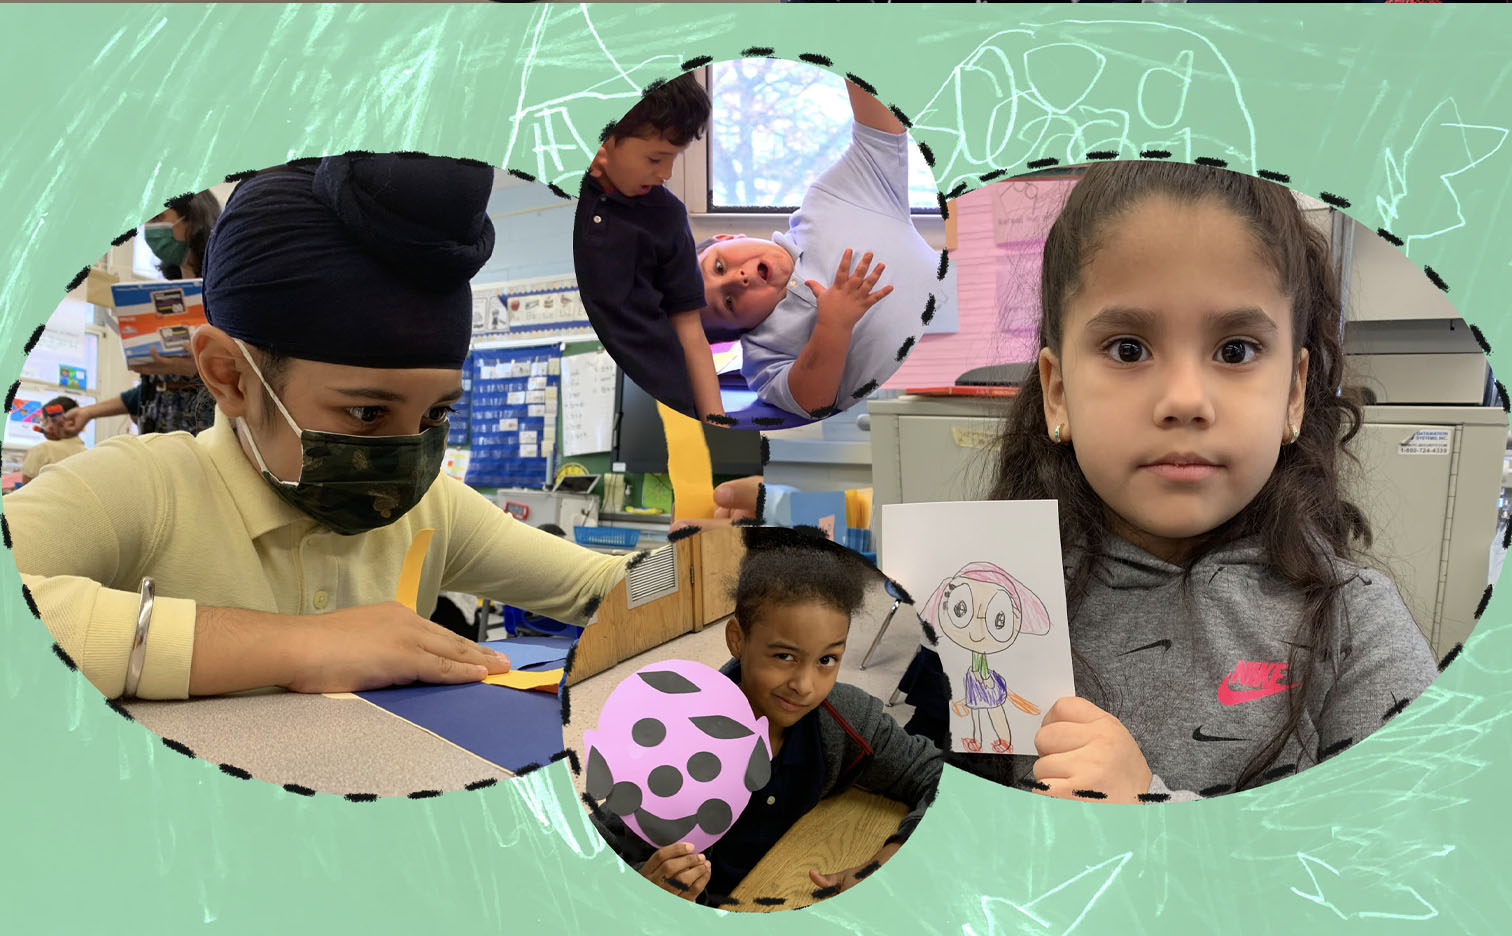
Composite image: 1) Student experimenting with yellow torn paper strips and crumpled blue paper 2) A student shows a dramatic example of what the feeling surprise could look like 3) A girl shows the puppet character she has drawn 4) a child wiggles his eyebrows to make the same face as the puppet he has collaged with 5 shapes.


Plan for choice in any medium

Often, creative tools and materials appear mundane at first glance. It is what the artist learns to do with them that creates the artistic “magic”. Knowing a variety of choice options in any medium opens the door to expression.

 
  • Student experimenting with yellow torn paper strips and crumpled blue paper during art making.
    Artists are inventive with tools and materials

    Authentic expression and creativity happen not from the largest number of materials, but from having the chance to be inventive by using and pushing against the tools you have. Building artistry involves becoming aware of the possibilities in the medium as an artist builds skills in an artform.


Centering choice making checklist

Open up each checkpoint for additional resources.


What assumptions are creating barriers to choice?

Skill

Assumption: Young artists have to acheive a certain level of technical skills before they are able to make choices

Resource: Check out the Removing Barriers to Choice section of this page

Materials

Assumption:  With the materials available in our school, the choices are limited.

Resource: Check out the One Pencil: Infinite Choices section of this page

Safety

Assumption: We cannot engage in physical expression in our classroom for safety reasons.

Resource: Check out the Safety Limits/ Creative Limits section of this page.


What artistic choices will kids make and how will I describe them?

  • A composite image- 1) A blank copy of
    Use a describing tool!

    Make a describing tool in advance to clarify the artistic choices that you will invite children to make in this lesson and prepare yourself to describe the variety of expressive responses young artists might have to being given these choices.

    Fill out a blank describing tool, or use one of ours, to lay out the choices artists will discover and use in your lesson.

    Fill out the right side of the describing tool to be ready with rich specific describing words.

    Learn more about the Notice, Describe & Ask Protocol


How will kids learn about the expressive tools and choices?

Scaffold your lessons for choice making

How will the warm up prepare the kids to make choices?

Does the lesson give kids time to explore & describe the artistic tools before rushing to make a product?

Is there time for kids to develop their work independently?

For support visit the 3- Phase Artisic Process Page

Check out examples on this page

Build in Reflection

When/How will students reflect on choices?

When will I notice, describe & ask about their choices?

When will students have time to talk to each other about their work?


How are the parameters and rules serving the children?

Assess and clarify what the parameters and rules are in your lesson and why they are there.  Make adjustments as needed to better support student choice and agency.

Assess the parameters in your lesson

Are the limits and structures in this activity offering energizing challenges?

Will the limits and structures reduce overwhelm and help kids focus their energies?

Assess the rules in your lesson

What rules do I need to be transparent about?  What do the kids need to know to do this work in a way that is safe for them, others, and for their artwork?  How will I frame these rules/ involve kids in generating these rules?

Do the rules hinder the artist’s work process?  Are they there for arbitrary reasons?  If the answer is yes, change them.

How will your plan flex and respond?

How might the assignment change as artists work?

How might some artists push against the structure, or use the structure as a springboard to a different direction?

Is there time and space in your lesson for you to learn about your students and how they want to work?

Examples and Supports

Check out these sections on this page


Removing Barriers to Choice

How can we support young artists in building creative skills at the same time that they build their technical skills, rather than delaying their chance to experience the joy of expressing their ideas and full selves through our medium?

 
  • A composite image- 1) A blank copy of
    Choice making is a foundational skill, not a reward or privilege

    In many artistic traditions, students are only afforded the opportunity to compose or improvise once they have trained for years to attain certain skill sets. The Bridges model encouragesd arts educators who have been trained this way themselves, to question their assumptions about when a young person can be given the chance to make artistic choices.

    Make your own describing tool
  • https://www.youtube.com/embed/dNmvziNf2lQ
    Engaging artistic expression, while skill building

    For students in a short intro program, it’s valuable to experience creating, alongside building experience and skills in the medium. Rima Fand developed a Play How you Feel Warmup that enabled her students to tell stories musically with their violin after 5 lessons. See the artistic tools these young violinists could work with after 5 sessions in the

    Describing Tool: Play How You Feel (for violin)
  • https://www.youtube.com/embed/xth2CkwAyYM

    “I was very bored in math” Pitch and articulation

    This artist alternates a long high note with a long low note to convey their experience.
    More music resources
  • https://www.youtube.com/embed/0m5qzAhV4ao

    “Excitement then disappointment” rhythmic feel

    This artist used choices about pitch, tempo and rhythm to tell the story of their morning.
    More music resources
 

One pencil: infinite choices

Pencil drawing is not the flashiest artwork to an adult eye, but the power to grab a pencil anywhere and explore what’s on your mind without need for additional art materials, or an adult, makes this a tool for putting kids in charge.

 
  • https://www.youtube.com/embed/wtxc3wL0Xdo
    Hidden Magic: Find the tools hidden in one pencil!

    In this video, learn about some ways to unlock the magic in a pencil and introduce the variety of choices that kids can explore using this tool.  When given time and freedom to truly discover what their pencil can do, children will make an extraordinary number of unique choices in their pencil drawing.  See examples below!

    Describing Tool: Drawing with Pencil
  • Two Pencil drawings made by different students, both depicting puppet characters. One is just a close up of a head with lots of shapes inside of shapes to show the details of the face. The other shows an entire body and focuses more on details of cosutme and body posture.
    Drawing expressive characters with pencil. Notice the choices!

    This class used pencil to draw emotionally expressive characters that they later turned into simple puppets.  Scroll through these examples and notice the variety of choices that these artists made with just this simple tool and in response to the same prompt. For support use the

    Describing Tool: Drawing with Pencil
  • Two Pencil drawings made by different students, both depicting a person in a horizontally striped shirt, with round ears a triangle nose and a smile showing teeth. One has pressed very hard to make dark lines, used a circle for hands, and drawn a single dark tuft of hair in the middle of the head. The other has pressed lightly, used long bumps to make fingers at the end of the long oval arm and has drawn the hair across the head with one spiral tufting up on the side.
    Drawing expressive characters with pencil. Notice the choices!

    This class used pencil to draw emotionally expressive characters that they later turned into simple puppets.  Scroll through these examples and notice the variety of choices that these artists made with just this simple tool and in response to the same prompt. For support use the

    Describing Tool: Drawing with Pencil
  • Two Pencil drawings made by different students, both depicting an expressive character. One has used circles for nose and eyes a half cicles curcling up for a mouth and curves for eyebrows. The other has vertical and horizontal lines in side a half circle, curving down for the mouth, two diagonals going down toward the center for eyebrows and a triangle nose.
    Drawing expressive characters with pencil. Notice the choices!

    This class used pencil to draw emotionally expressive characters that they later turned into simple puppets.  Scroll through these examples and notice the variety of choices that these artists made with just this simple tool and in response to the same prompt. For support use the

    Describing Tool: Drawing with Pencil
  • Two Pencil drawings made by different students, both depicting the playground. One has a wavy horizontal line across the top and a spiral inside a circle with short lines radiating out of it. Below, many diagonal lines going in different directions come to a point with short horizontal lines repeated between them. The other drawing has criss crossed diagonal lines in clusters scattered across the top and middle and a loopy line that closes to make a bumpy shape. There are long diagonals stretching from the top to the bottom of the page.
    Expressing setting detail with pencil. Notice the choices!

    This class used pencil to draw playground and carnival settings.  Scroll through these examples and notice the variety of choices that these artists made with just this simple tool to express the details they imaged in this setting. For support use the

    Describing Tool: Drawing with Pencil
  • Two Pencil drawings made by different students, both depicting a slide at the park. Both feature a swooping curve moving from the top left to bottom right of the page. One has drawn characters stacked from top to bottom. The other has made repeated bumpy shapes along the swooping curve. One has made a used dark, quick vertical lines across the top of the page and lighter diagonal wavy lines to show lots of details in the sky. The other has used the top of the page to made a thought bubble showing how one of the characters feel.
    Expressing setting detail with pencil. Notice the choices!

    This class used pencil to draw playground and carnival settings.  Scroll through these examples and notice the variety of choices that these artists made with just this simple tool to express the details they imaged in this setting. For support use the

    Describing Tool: Drawing with Pencil
  • Two Pencil drawings made by different students, both depicting a ferris wheel at the fair. One child has filled the ferris wheel with thick horizontal lines, made by pressing hard. They have drawn tiny people enclosed in bumps radiating around the edge of the ferris wheel. The other child has drawn light radiating lines inside their wheel and written
    Expressing setting detail with pencil. Notice the choices!

    This class used pencil to draw playground and carnival settings.  Scroll through these examples and notice the variety of choices that these artists made with just this simple tool to express the details they imaged in this setting. For support use the

    Describing Tool: Drawing with Pencil
  • https://www.youtube.com/embed/CKWXw71yrv4
    Describe Gestural Choices

    Gesture = Movement. When drawing with pencil, artists use their body as a tool to make expressive choices about the pressure, energy, speed and scope of their movements. Watch this video to practice noticing and describing gestural choices.  When their choices are described, it builds the artists’ confidence and awareness of their choice making process.

    Describing Tool: Pencil Drawing
  • https://www.youtube.com/embed/WrJXEIvHAP8

    Describe Graphic Choices

    Artists make graphic choices about the direction, shape and size of the marks they make with pencil. Watch this video to practice noticing and describing kids’ choices.
    Describing Tool: Pencil Drawing
  • https://www.youtube.com/embed/VnIoJvaxdrk

    Describe Composition Choices

    Artists use tools of placement and spacing, shape and texture to make artistic choices. See them in action in the video!
    Describing Tool: Pencil Drawing
 

5 Shapes, Many Emotions

In this project, students work with 5 precut black shapes. The assignment requires them to experiment with how they can make inventive choices about composition in order to express their ideas-  They found infinite variations.

 
  • https://www.youtube.com/embed/Dt0xi0pVCko
    How many faces can you make with just 5 shapes?

    With only 5 shapes and 1 color, students are limited to making specific choices about shape, spacing, direction and pattern.  The limitations necessitate that they take risks, invent, problem solve and notice the impact of their compositional choices on the expressions of the faces they are making.

  • https://www.youtube.com/embed/KjxpNhO1TVk
    Why limit the palette to just these 5 black shapes?
    • The black shapes contrasted on a single color focuses artists on inventing ways to use form, composition, and layering  to create new shapes and textures.
    • The curved and pointy shapes create interesting forms between shapes, encouraging thoughtful use of negative space. Straight shapes didn’t do this as well.
  • Student reflects by looking ponderously at the two contrasting emotion puppet faces she has made.
    What do students gain from this sort of challenge?

    A limited palette of choices can reduce overwhelm, help artists to focus their choice making energies, and provide an engaging and energizing challenge!

  • https://www.youtube.com/embed/NCYY9awbKLY
    What choices are the artists making? Describe them!

    Give young artists valuable information about the impact of  their choice making, by noticing and describing the choices they make  using specific language. Watch this video to build your describing skills.  For support use the

    Describing Tool: 5 Shapes Collage
  • https://www.youtube.com/embed/99roUZkBnm8
    Give kids space to make a “safe” choice first, and time to experiment without glue

    Artists will often start with predictable choices (Ex: using circles for eyes).  It’s ok if some kids need time to feel comfortable with exploring. As adventurous peers try different options, and experimentation is encouraged and modelled, kids will start to take risks with how they use the shapes, and discover a wide variety of emotions they can express.

  • https://www.youtube.com/embed/6IbczQDDdyU
    Different artists, different preferences.

    Some artists find the limiting of tools energizing and focusing. Others might struggle with the limitations. Exploring and reflecting on different artistic tools helps an artist know their preferences, discover tools they wouldn’t have ordinarily used and build their ability to work both inside and outside of their immediate comfort zone.

  • https://www.youtube.com/embed/6IbczQDDdyU
    Supporting depth of learning

    By focusing on a limited set of tools in each lesson, artists get to know each tool deeply, in a way they couldn’t if all were on the table at once.  Artists experience each tool deeply and experimentally build their creative skills and understanding of each artistic tool and gradually addiing more detail to their work.

  • https://www.youtube.com/embed/6IbczQDDdyU
    Different lessons, different choices.

    Lesson 1: Working with just the 5 shapes, to explore shape, spacing, direction and pattern to make faces.

    Lesson 2: Working with strips of color construction paper to expanded exploration into color and 3-D form and create hair.

    Lesson 3: Working with a variety of patterned and textured collage materials to expand into texture, and create bodies and


Safety Limits/ Creative Limits

How can we reframe the limits that we put on physical expression for safety, as creative limits within which children are invited to be inventive and make choices about how they express themselves?

 
  • https://www.youtube.com/embed/jy4JBCJfVD4
    Transform limits on how children can move into creative challenges.

    Make a describing tool to enumerate the artistic tools artists can use [ within the physical limits], and start describing in detail the very different ways your children are moving their bodies. Share these many possibilities, and use the describing tool to describe the variety of choices your students are making. Scroll for more info.

    Describing Tool: Face & Body
  • https://www.youtube.com/embed/jy4JBCJfVD4
    “How can you show bumpy using only your shoulders?”

    Kindergarten classroom teacher Julissa Acosta has the children explore bumpy using only…” one body part at a time. She describes the DIFFERENT ways children show bumpy within that body part. In the final round, when children have explored the variety of possibilities in each body part, they are ready to creatively and safely explore all body parts at once.

  • Three students show the feeling scared, but with varied arm gestures while playing the Emotion Statue game.

    Describe with specificity to support unique choices

    When kids’ choices are described, it encourages originality. In this example each child shows their unique version of the emotion “shocked”.
    Describing Tool: Face & Body
  • https://www.youtube.com/embed/VIQBv1K4YhI

    Consistancy supports commitment to choices

    A reset/release ritual between responding physically to prompts provides kids with a safe structure in which they can fully commit to their choices.
 

Parameters, rules & choices

Many artists need structure to focus their thinking and choice making.  Limitation famously challenges creative innovatotion. Set up parameters and rules thoughtfully to support young artists in developing their choicemaking skills

 
  • https://www.youtube.com/embed/dJ9vtZnXZoA
    Make and clearly communicate a simple plan for how artists in your class are being asked to…
    1. challenge themselves to work within project parameters.
    2. focus their choice making energies.
    3. follow rules or community agreements (and why!)
    4. be ok with making  “mistakes” and let go of the need to “do it perfectly.”

    Watch this video for an example and scroll for more details.

  • Teaching artist Kari Morris wearing a sparkly fedora, smiling and holding up a purple rabbit puppet they drew with colored pencil and taped onto a popsicle stick.
    In this video, the kids are challenged to…
    1. Work within parameters- Draw an animal puppet that fills a whole quarter of the paper.
    2. Make choices- about what animal to draw an how to get ideas.
    3. Remember some rules 1) Ask adults for permission to usen materials 2) Draw a circle around the puppet before cutting.
    4. Let go! Make “mistakes” and erase as needed. Don’t worry abo
  • https://www.youtube.com/embed/7n41hNxmSOM

    Flexible Parameters

    Assignment parameters provide flexible structure to help artists’ work. Ex:
    “Explore these shapes to make a face”
    “Pose to show how you feel”
  • https://www.youtube.com/embed/3upJajWmQcI

    Welcome children who work outside the box.

    Artists have artistic ideas that don’t fit inside the parameters of the assignment, or follow a choicemaking process that leads them elsewhere.
  • Each artist uses parameters a little differently.

    Sometimes artists work comfortably inside a structure, and sometimes structure is a springboard they push against.
  • Focus on process:

    Prioritize children going through an authentic choice making process to make something, rather than addressing assignment parameters.
  • Involve kids in generating the rules. Examples:

    How should we hold our puppets so that it’s safe for our bodies?
    How can we move our puppets without breaking them? How should we not move them?
  • Be transparent: How do the rules protect the safety of artists, their process and their artwork?

    Examples:

    We don’t fall on this floor in this game because we don’t want anyone to get stepped on.

    Put your name in this spot, so it won’t get covered up later and we know it’s yours.


  • Clarify and question the purpose of the rules for yourself to avoid arbitrary enforncement

    When planning, distinguish between flexible parameters/structure and rules, and assess why rules are there. Rules should be a way of caring for each other.  They should not hinder an artists’ work process for arbitrary reasons. Reflecting in advance will allow you to respond meaningfully in the moment when a child questions a rule.

Close